Django: basic auth with django-allauth
Django is a web framework that comes with a lot of stuff built for you, so you
can focus on building your application instead of a web framework. Django also has
a large ecosystem of apps that you can use with your Django project! Here you will
use the django-allauth package which will handle the authentication processes
for you. You will have a running Django website with authentication in no time!
Preparing the environment: virtualenv and Django
One of the best practices when developing Python things is to use virtual environments. By using them, you have isolated Python interpreters with their respective packages. This allow you to have two applications that use the same package at different versions without any problem, each one with its virtual environment.
Since Python 3.3 there is a module in the standard library called venv
which creates virtual environments. There is also a package called virtualenv
that has the same function. Create a folder and try to create a virtual environment
inside it:
$ mkdir django-authweb
$ cd django-authweb
$ python3 -m venv venv
If the last command fails with something like this:
The virtual environment was not created successfully because ensurepip is not
available.  On Debian/Ubuntu systems, you need to install the python3-venv
package using the following command.

    apt-get install python3-venv

You may need to use sudo with that command.  After installing the python3-venv
package, recreate your virtual environment.

Failing command: ['/venv/bin/python3', '-Im', 'ensurepip', '--upgrade', '--default-pip']
You have two options: follow those instructions and run apt-get install python3-venv
or install virtualenv with python3 -m pip install virtualenv. In the second case
to create a virutal environment:
$ virtualenv -p python3 venv
You now should have a working virtual environment. Activate it. A visual mark should appear in your promt, indicating that you are inside a virtual environment:
$ source venv/bin/activate
(venv) $  # This is the visual clue
(venv) $ pip install django
Django app skeleton
Django is here to speed up your development, and Django itself assumes a lot of
things, so it comes with tools that help you to create a functional structure
for your project. You will use django-admin to create the skeleton of
your application:
(venv) $ django-admin startproject authweb .
(venv) $ tree
.
├── venv/  # The virtual environment files
├── authweb
│   ├── __init__.py
│   ├── settings.py
│   ├── urls.py
│   └── wsgi.py
└── manage.py
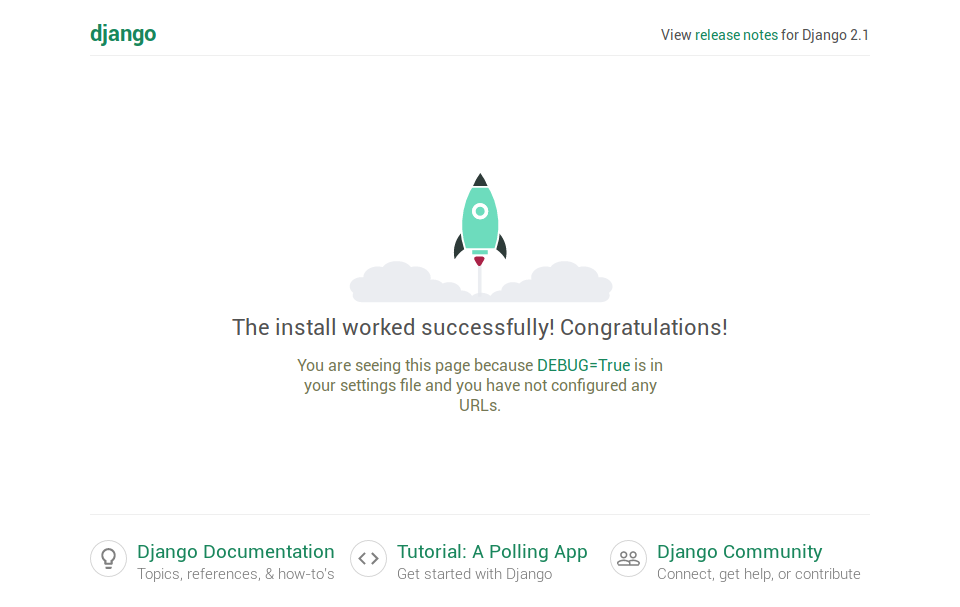
Right now you can start the development server using the manage.py script:
(venv) $ python manage.py runserver
Open http://localhost:8000/ and you should see this page:
Installing allauth for login
While implementing your custom solutions for a problem can be rewarding in terms of
satisfaction and knowledge acquired, sometimes is better to use an existent solution.
django-allauth comes with templates, email verification, password reset and more features that
help you to reduce the time spent in implementing those. Here you will use it
to handle the authentication of users. Install it using pip:
(venv) $ pip install django-allauth
Now you should modify the authweb/settings.py file in order to enable it and
make it work (documentation <https://django-allauth.readthedocs.io/en/latest/installation.html>_).
[...]  # Default content of settings.py

AUTHENTICATION_BACKENDS = [
    "django.contrib.auth.backends.ModelBackend",
    "allauth.account.auth_backends.AuthenticationBackend",
]

INSTALLED_APPS += [
    "django.contrib.sites",
    "allauth",
    "allauth.account",
    "allauth.socialaccount",
    "authweb",
]

LOGIN_REDIRECT_URL = "home"
SITE_ID = 1
AUTH_USER_MODEL = "authweb.User"
ACCOUNT_EMAIL_VERIFICATION = 'mandatory'
ACCOUNT_EMAIL_REQUIRED = True
EMAIL_BACKEND = "django.core.mail.backends.console.EmailBackend"
TEMPLATES[0]["DIRS"] += [os.path.join(BASE_DIR, "templates")]
Here you are doing a couple of things: adding allauth to your application, telling Django that you will be using a custom User model, making the email validation mandatory and printing the emails sent to the console, telling the template engine to search in a folder called “templates” at the root of the project, etc. All of this will make your application to work for now.
Customizing the User model
Now you will create new files that will create a new User model from the default given by Django. You will also register that new user into the Admin backend. This is recommended when starting new projects, maybe you won’t ever need to change the User, but doing this you’ll cover your back.
(venv) $ touch authweb/admin.py authweb/models.py
(venv) $ tree
.
├── venv/
├── authweb
│   ├── __init__.py
│   ├── admin.py  # New
│   ├── models.py  # New
│   ├── settings.py
│   ├── urls.py
│   └── wsgi.py
└── manage.py
Start by models.py:
# authweb/models.py
from django.contrib.auth.models import AbstractUser

class User(AbstractUser):
    pass
Here you are extending the default user implementation and adding nothing
to it. If the need comes, here you will be able to code new attributes for
your users. Now the admin.py:
# authweb/admin.py
from django.contrib import admin
from django.contrib.auth.admin import UserAdmin

from .models import User

admin.site.register(User, UserAdmin)
With the custom user created, here it’s being added to the administration section of Django.
Basic view for testing
Now that you’ve added the new user model and registered it in the admin section, you can start
to creating a landing page. Here you can a find a basic template for testing. Allauth come with
most of the templates, but the landing page should be provided by the user. Create a
authweb/views.py file:
# authweb/views.py
from django.views.generic import TemplateView

class Home(TemplateView):
    template_name = "home.html"
Now create a directory called templates in the root folder with a home.html file
inside:
(venv) $ tree
.
├── venv/
├── authweb/
├── templates/  # This
│   └── home.html  # This
└── manage.py
And paste this into the HTML file:
{% raw -%}
{% load account socialaccount %}
<body>
    <h1>Django Allauth Tutorial</h1>
    {% if user.is_authenticated %}
    <p>Welcome {{ user.username }} !!!</p>
        {% if user.has_usable_password %}
        <p><a href="{% url 'account_change_password' %}">Change password</a></p>
        {% else %}
        <p><a href="{% url 'account_set_password' %}">Set password</a></p>
        {% endif %}
    <a href="{% url 'account_logout' %}">Logout</a>
    {% else %}
    <a href="{% url 'account_login' %}">Sign In</a> or <a href="{% url 'account_signup' %}">Sign up</a>
    {% endif %}
</body>{% endraw %}
And then use that view in the urls.py file, where we add the Django Allauth
URLs too (admin URLs come by default):
# authweb/urls.py
from django.contrib import admin
from django.urls import include
from django.urls import path

from .views import Home

urlpatterns = [
    path("admin/", admin.site.urls),
    path("accounts/", include("allauth.urls")),
    path("", Home.as_view(), name="home"),
]
Migrations
Create the migrations (changes in the database), run them against the database. This will create the pertinent tables so your application stores information.
(venv) $ python manage.py makemigrations authweb
Migrations for 'authweb':
    authweb/migrations/0001_initial.py
        - Create model User

(venv) $ python manage.py migrate
Operations to perform:
    Apply all migrations: account, admin, auth, authweb, contenttypes, sessions, sites, socialaccount
Running migrations:
    Applying contenttypes.0001_initial... OK
    [...]
    Applying socialaccount.0003_extra_data_default_dict... OK
Testing!
Start the development server with python manage.py runserver and register a new user.
Click sign up, fill the fields and signup.
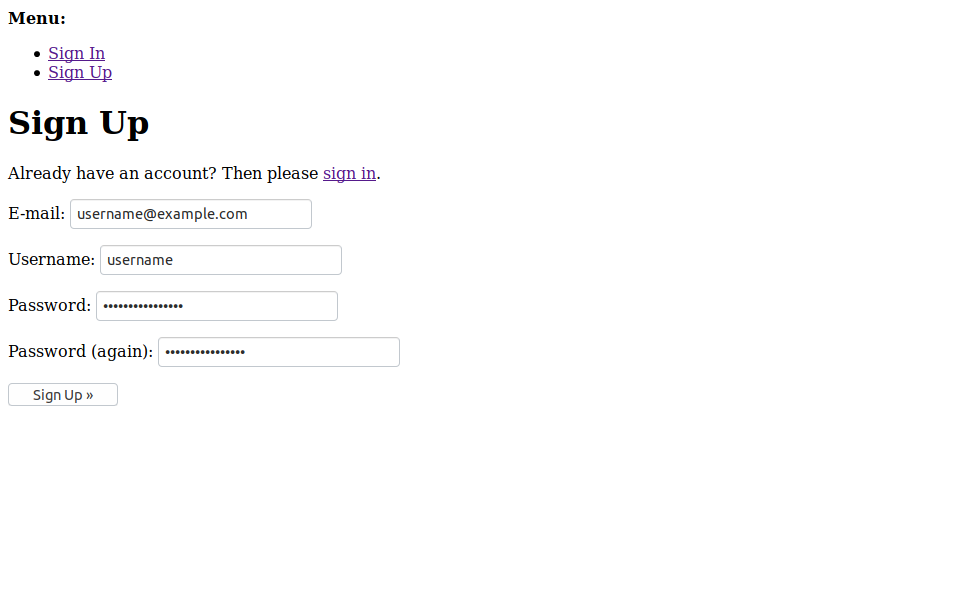
Sign up your new account.
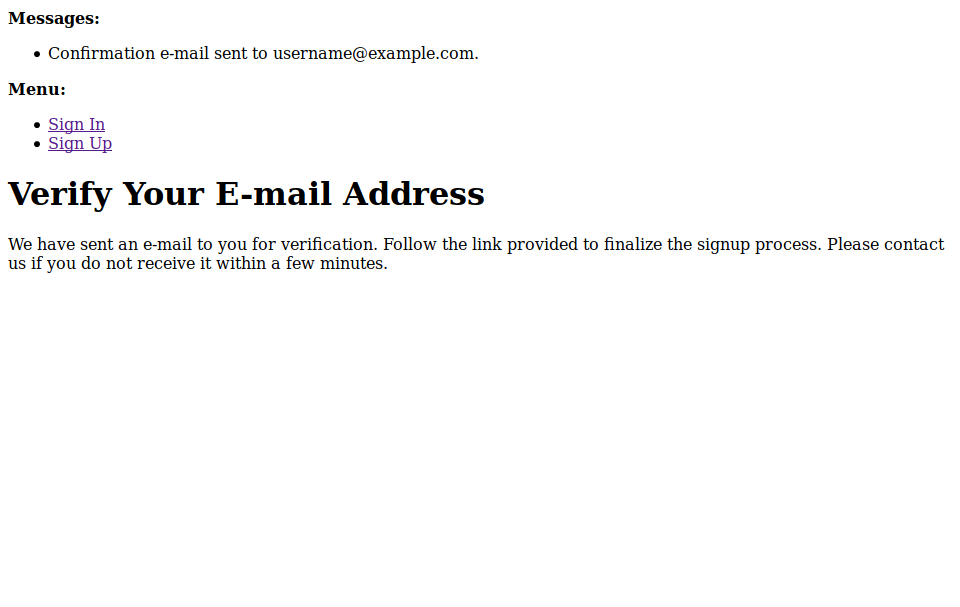
Verify the email usign the terminal.
Then you should see an email in the terminal looking like this one:
Subject: [example.com] Please Confirm Your E-mail Address
From: webmaster@localhost
To: username@example.com

Hello from example.com!

You're receiving this e-mail because user username has given yours as an e-mail address to connect their account.

To confirm this is correct, go to http://127.0.0.1:8001/accounts/confirm-email/MQ:1gsnl3:iiag-ubYZzp08arceovMGYvxbQA/

Thank you from example.com!
example.com
-------------------------------------------------------------------------------
Go to the URL inside the message and you have your email successfully validated.
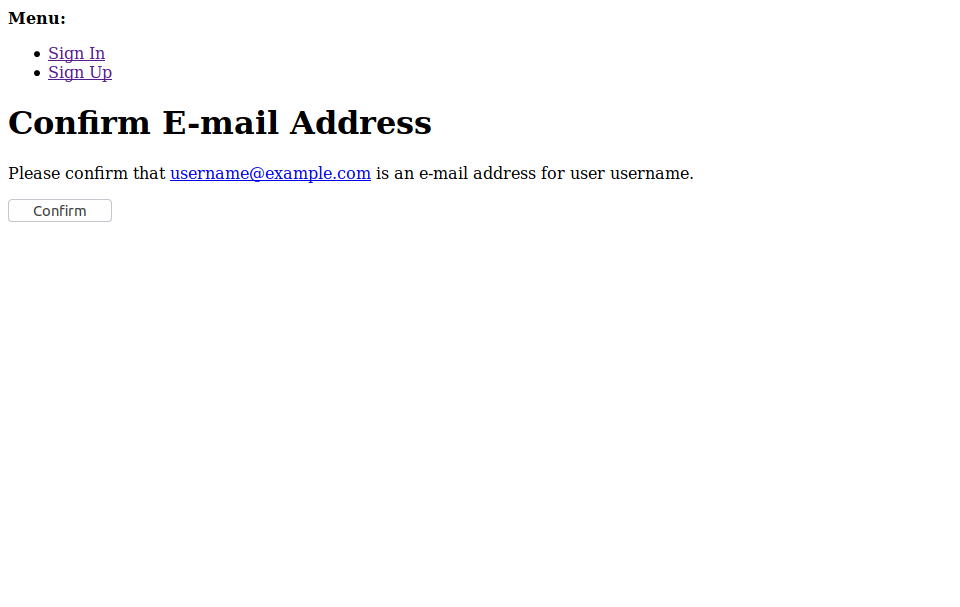
Confirm your email.
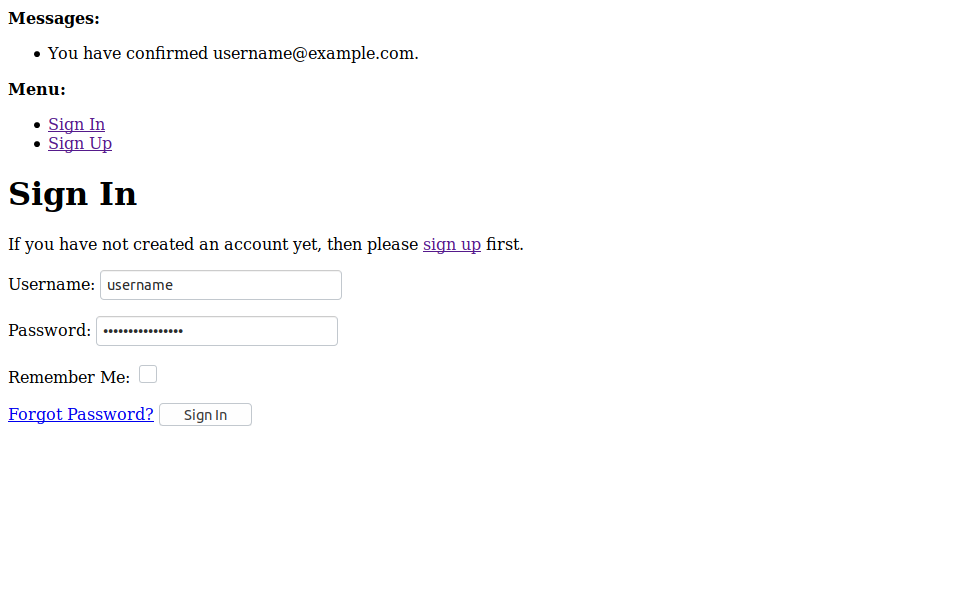
Log in with your account.
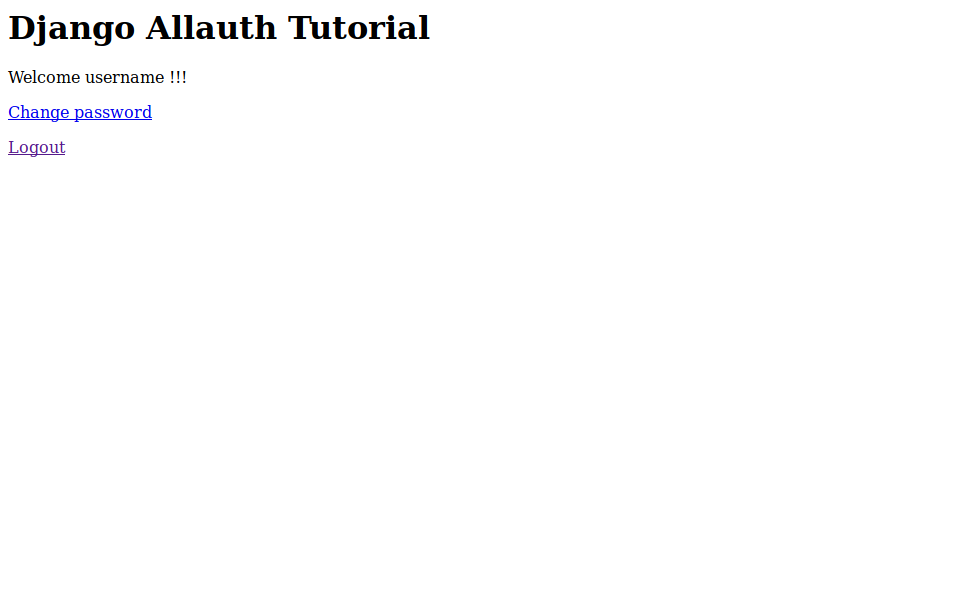
Great! You are in!
With allauth you can restrict certain actions to have the email validated or make the email validation madatory. Check the Allauth documentation to learn more about it.
That concludes this post! Now you can customize the allauth templates, the signup process, etc. I hope this was useful, let me know in the comments below!
It was useful? Done something similar? Have feedback?